


How to Fix a Flat Tire
Tubeless MTB Edition
By Danielle Vilaplana, Product Content Writer | Updated April 10th, 2024

Getting a flat on your tubeless mountain bike tire can be frustrating, but fear not! Flats in your tubeless tires can happen for a number of reasons, this step-by-step guide will walk you through the diagnostics and how to fix a flat tubeless mountain bike tire quickly. Whether you're a seasoned rider or a beginner, this guide will make the task straightforward and hassle-free.
There are several benefits to tubeless mountain bike tires, including puncture-resistance and easily-fixed flats. Not having an inner tube eliminates the risk of pinch punctures and in most cases, flat tubeless tires can be repaired without removing the wheel. The sealant will resolve many punctures automatically by sealing the hole - all you have to do is add air. Slightly larger punctures may require removing the valve core to add more sealant or plug the hole yourself with a tire plug, but these fixes can be done with the wheel in place. You will want to remove the tire for bigger punctures and sidewall gashes, and we'll get into that below.
Read on for instructions on how to fix a flat tubeless mountain bike tire, as well as a few preventative measure you can take to stop unnecessary flats.
Tools

Before you begin, make sure you have the necessary tools and materials:
- Bacon strips or rubber plugs
- Plug Tool
- High-volume pump or air cartridge
- Tire levers
- Tubeless tire boots
- Multi-tool or allen keys
- Bucket of soapy water
- Sealant
- Valve core remover tool or pliers
- Spare tube, just in case
Assess the Damage
Start by identifying the cause of the flat in your tubeless tire. Look for punctures, tears, slashes, or any foreign objects lodged in the tire. If you find any foreign objects in the tire, be sure to remove them first. If the sealant has plugged the hole, you might see dried sealant around the area. Be sure to check the rim for any damage as well.
Small Punctures
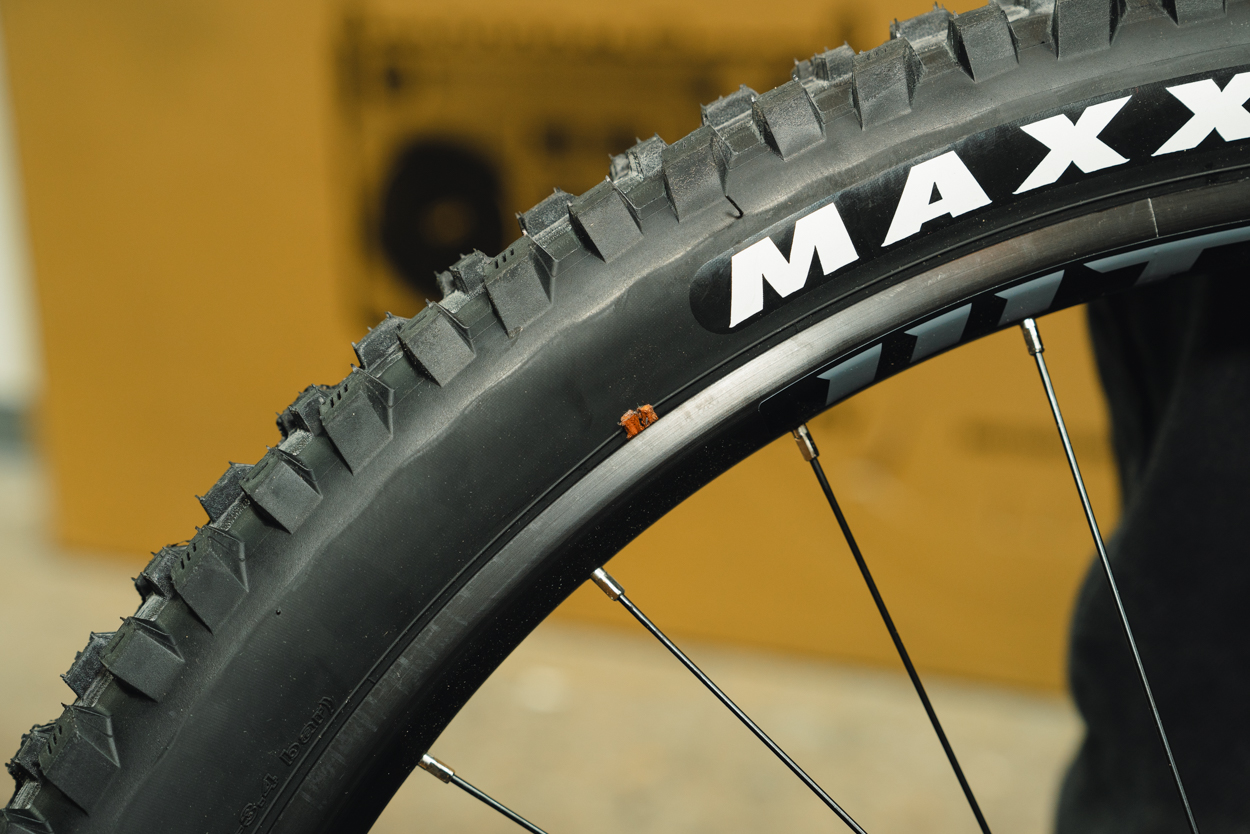
For slightly larger punctures in your tubeless tire, you'll want to use bacon strips or tire plugs to fix the flat. These frequently come in tool kits with a tire plug tool.
- Clean the puncture
- Insert the plug into the tool and apply adhesive onto the plug.
- Insert the plug into the tire and pull the tool out slowly, leaving the plug in the tire. Be careful not to insert it too deep and damage the rim's seal tape.
- Inflate the tire to minimum tire pressure and check the plug before riding. Any remaining leaks should be filled with sealant are you rotate the tire.
- Inflate the tire to minimum tire pressure and check the plug before riding. Any remaining leaks should be filled with sealant are you rotate the tire.
Large Punctures
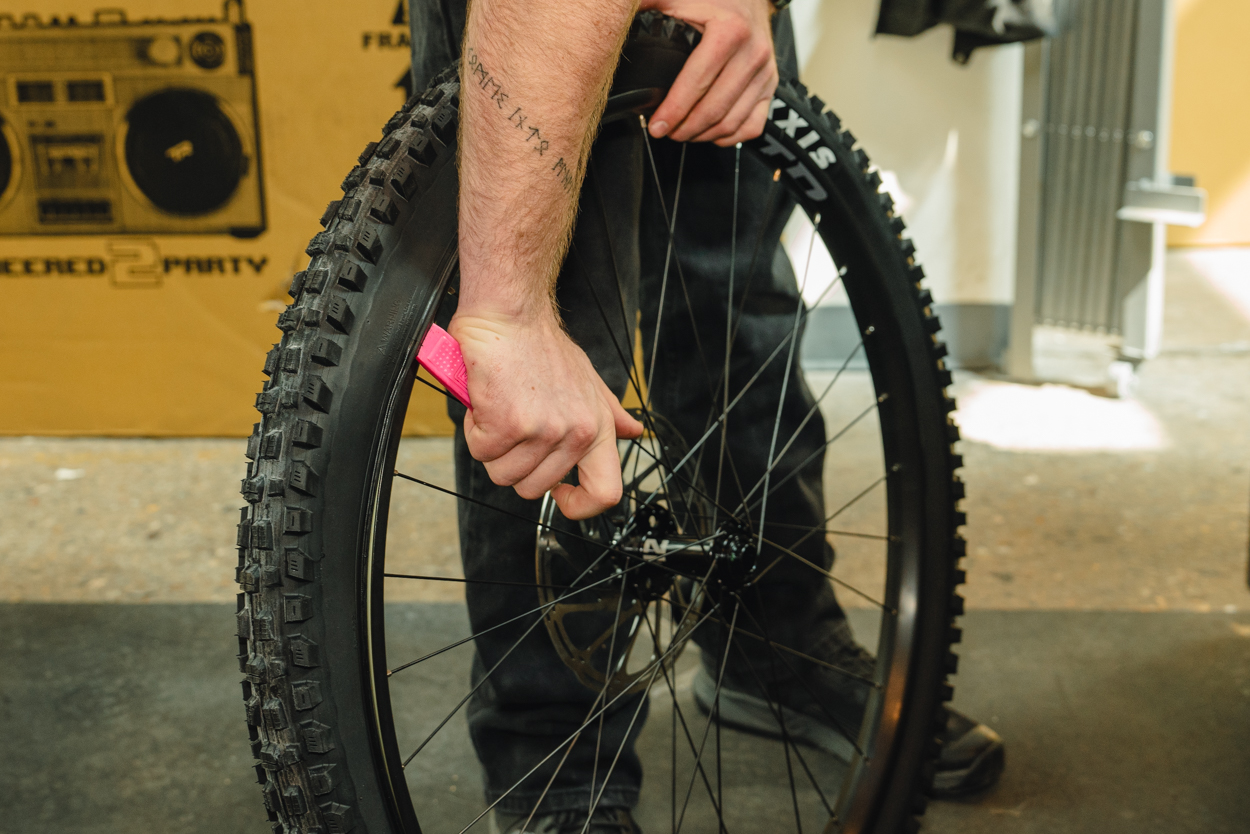
Flats from large gashes in your mountain bike tire call for removing the tire. You'll need a multitool, tire boot, tire levers, and an air pump or cartridge.
- Remove the Wheel: Use your multi-tool to loosen the axle bolts or quick-release skewer. If you have a rear flat, shift into the smallest gear before removing the tire.
- Release Air Pressure: Ensure the tire is fully deflated by pressing the valve core. This step is crucial to make the tire removal process easier.
- Break the Tire Bead: Using tire levers, gently pry the tire bead away from the rim. Work your way around the tire until one side is completely unseated. Be cautious to avoid damaging the tire or rim.
- Inspect the Tire: Check for any visible damage to the tire, such as cuts, punctures, or tears. Also, inspect the rim tape for any issues. Pull out any foreign objects lodged in the tire.
- Apply a Tire Boot: apply a tire boot or patch to the cut area. It's best to insert a spare tube for a few days to ensure the boot adheres properly. Most tire boots will be good for the tire's lifetime.
- Reinflate the Tire: Use your CO2 inflator or pump to reinflate the tire. If using a hand pump, you'll need a high pressure pump to set the bead again. If you're fixing your flat at home, a regular pump can set the beat, but you'll have to work hard to get the tire to snap back into place. To check for proper seating of the tire bead on the rim, listen for any hissing sounds, which could indicate a persistent leak. Also make sure there aren't any bulges in the tire.
- Reinstall the Wheel: After confirming that the tire is properly fixed and holding pressure, reinstall the wheel on your mountain bike. Tighten the axle bolts or quick-release skewer securely. Spin the tire to make sure there isn't any rubbing or unusual sounds.
Other Causes of Pressure Loss
If there is no visible damage to the tire, there are several other things that can lead to pressure loss and flat tubeless tires.
Riders who run their tubeless tires at very low pressure can get flats from the tire burps. Tire burps happens when the tire unseats in one spot and lets air out.
Tire inserts can prevent tire burping. They don't help with punctures but they do keep your tire from burping air by supporting the tire's sidewalls. They also provide a damper ride and prevent rim damage from rock strikes. Tire inserts do increase rolling resistance, however, and they're very difficult to install - unless you're a fan of frustration, it's best to let a shop install them for you.
Sometimes, flats can be caused by damaged or old rim tape. If the tape is peeling or doesn't have a good seal, it's time to replace it.
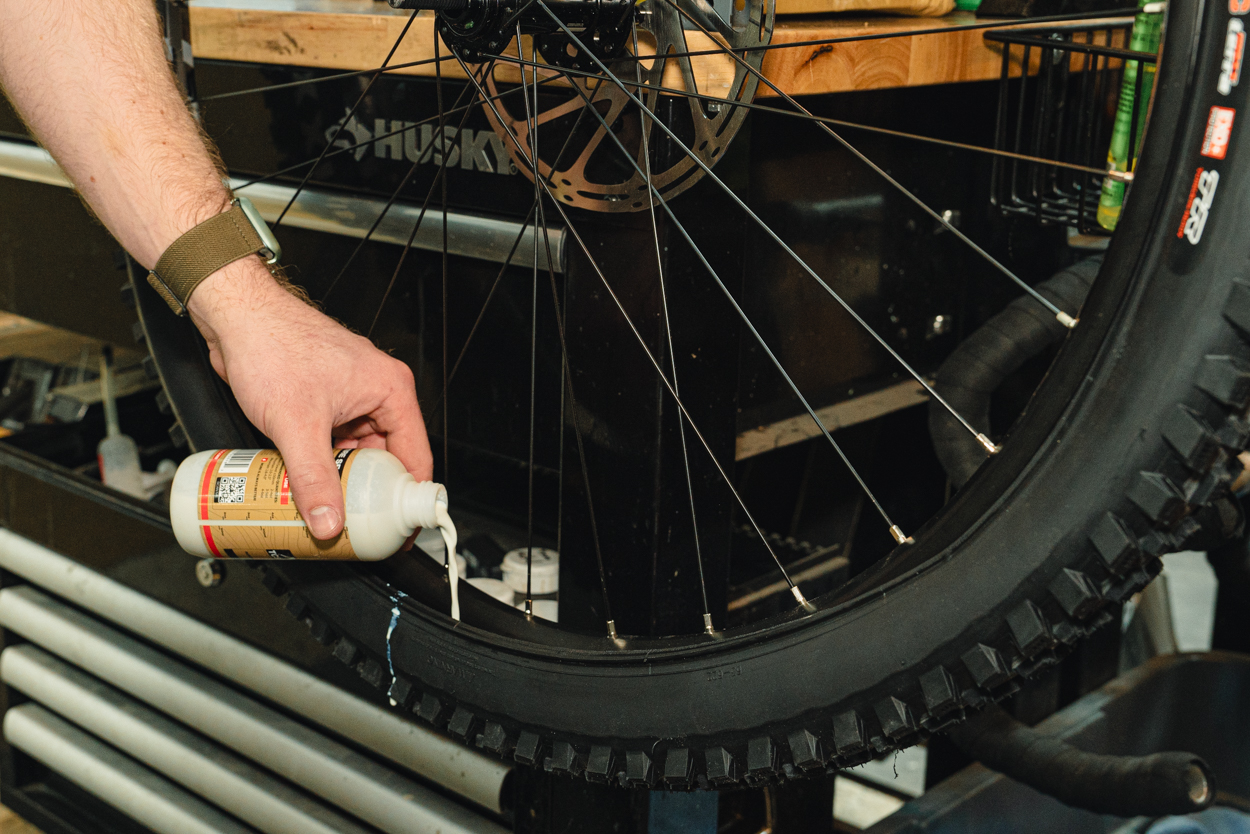
More often than not, it will simply be a case of refreshing your sealant. The sealant is composed of tiny rubber particles that fill smaller holes and it needs to be refreshed every six months or so. You can take one side of the tire off the bead to add the sealant, adding more sealant through the valve will do the job easily too if you have a small bottle of sealant handy.
- Remove the valve core: tubeless tires should all have Presta valves. A valve core remover tool will be the easiest to use, but you can also use pliers or even a chain breaker to twist it out in a pinch.
- Add sealant:using a small sealant bottle or sealant injector tool, add more sealant through the open valve. The amount of sealant required varies based on tire size, but 4oz is a good starting point.
- Replace the valve core.
- Reinflate the tire.
Preventing Flats in Your Tubeless Tire
Congratulations! You've successfully fixed a flat on your tubeless mountain bike tire.
Tubeless mountain bike tires are bound to get flats occasionally, but there are a few things you can do to prevent unnecessary problems. Inspect the tire regularly to make sure it's in good shape and top off your sealant every 6 months.
Most important, always carry a spare tube and patch kit while riding. A flat isn't the end of the world, but if you're not properly prepared, they can leave you stranded.
Happy riding!
Learn More With Our Other Bike Guides:
How to Choose a Mountain Bike
Mountain Bike Sizing and Fit Guide
How to Get Started Mountain Biking
How to Choose a Mountain Bike Wheel Size
Mountain Bike Suspension Basics
Women's Mountain Bike Buyer's Guide
How To Get Started Gravel Biking
Electric Mountain Bike Buyer's Guide
Classes of eBikes
Travel Guides - Where to Mountain Bike
Travel Guides - Where to Ride eBikes
Mountain Bike Cockpit Setup & Seat Height
How to Choose a Mountain Bike Dropper Post
How to Choose Mountain Bike Tires
How to Choose Mountain Bike Handlebars
How to Choose Mountain Bike Pedals
How to Choose Clipless Pedals, Shoes & Cleats
How to Choose a Bike Seat / Saddle
Women's Mountain Bike Gear & Clothing Guide
How to Choose MTB Knee Pads
Bike Helmet Size & Fit Guide
How to Choose Bike Shoes
Shimano Groupset Hierarchy Explained
SRAM Groupset Hierarchy Explained
SRAM vs Shimano Groupsets Compared
What to Bring Mountain Biking
What to Wear Mountain Biking
Mountain Bike Tire Pressure Guide
Mountain Bike Maintenance Schedule
How to Clean a Mountain Bike
How to Change Bike Pedals
How to Bleed SRAM Brakes
How to Bleed Shimano Brakes
How to Convert to Tubeless Tires
How to Replace Internal Cable Housing
How to Adjust Your Rear Derailleur
How to Replace a Bike Chain
How to Fix Bike Creaks & Noises